Making chocolate-covered Oreos using a mold is a fun and delicious way to create a festive treat. Here’s a simple step-by-step guide for you:
Ingredients:
6-8 Oreo cookies
1 cup of melting chocolate (dark, milk, or white chocolate)
Sprinkles or other decorations (optional)
Equipment:
– Oreo cookie mold (available in various shapes and sizes)
– Microwave-safe bowl
– Spoon or spatula
– Parchment paper
– Cooling rack
Instructions:
1. Gather Your Materials:
- Before you start your chocolate-covered Oreos make sure you have all your ingredients and equipment.
2. Prepare the Oreos:
- Twist open the Oreo cookies and set aside the side with the cream filling.
- Place the other half of the cookies in the mold, filling side down.
3. Melt the Chocolate:
- Chop the chocolate into small, even pieces for easy melting.
- Place the chocolate in a microwave-safe bowl.
- Microwave in 20-30-second intervals, stirring each time until the chocolate is smooth and fully melted. Be careful not to overheat, as chocolate can burn.
4. Coat the Oreos:
- Spoon a small amount of melted chocolate into each mold cavity, covering the bottom.
- Place an Oreo, cream-side down, into each mold.
- Spoon more melted chocolate over each Oreo, covering it completely.
5. Tap and Smooth:
- Gently tap the mold on the countertop to ensure the chocolate spreads evenly and removes any air bubbles.
- Use a spatula or the back of a spoon to smooth the chocolate on top.
6. Add Decorations (Optional):
- If you want to add sprinkles or other decorations, do so immediately after smoothing the chocolate.
7. Chill:
- Place the mold in the refrigerator for at least 20-30 minutes to allow the chocolate to set.
8. Demold:
- Once the chocolate is completely set, carefully pop the chocolate-covered Oreos out of the mold.
9. Serve:
- Your chocolate-covered Oreos are ready to be enjoyed! Serve them on a platter or wrap them in cellophane for a sweet gift.
Remember to get creative with the chocolate flavors, decorations, and mold shapes to customize your chocolate-covered Oreos for different occasions.
Storage Instructions
For optimal freshness, store your chocolate-covered Oreos in an airtight container at room temperature. When stored properly, these delightful treats can remain delicious for 2-3 weeks. If you’re preparing them for party favors or gifts, ensure a tight seal on plastic bags to maintain their quality. It’s important to note that over time, Oreos may start to soften, so if possible, enjoy them sooner rather than later for the best texture and flavor.
More Decorating Ideas:
Elevate your chocolate-covered Oreos with these creative decorating ideas:
1. Sprinkles Galore:
Dip Oreos in colorful sprinkles like rainbow or themed varieties for a burst of color and fun.
2. Crushed Candy Toppings:
Roll chocolate-dipped Oreos in crushed candies such as M&M’s or candy canes for a delightful crunch.
3. Edible Glitter or Dust:
Sprinkle edible glitter or dust over the chocolate for an elegant and shimmering touch.
4. Cookie Crumbs:
Crush extra Oreos into fine crumbs and sprinkle them over the chocolate for added contrast and flavor.
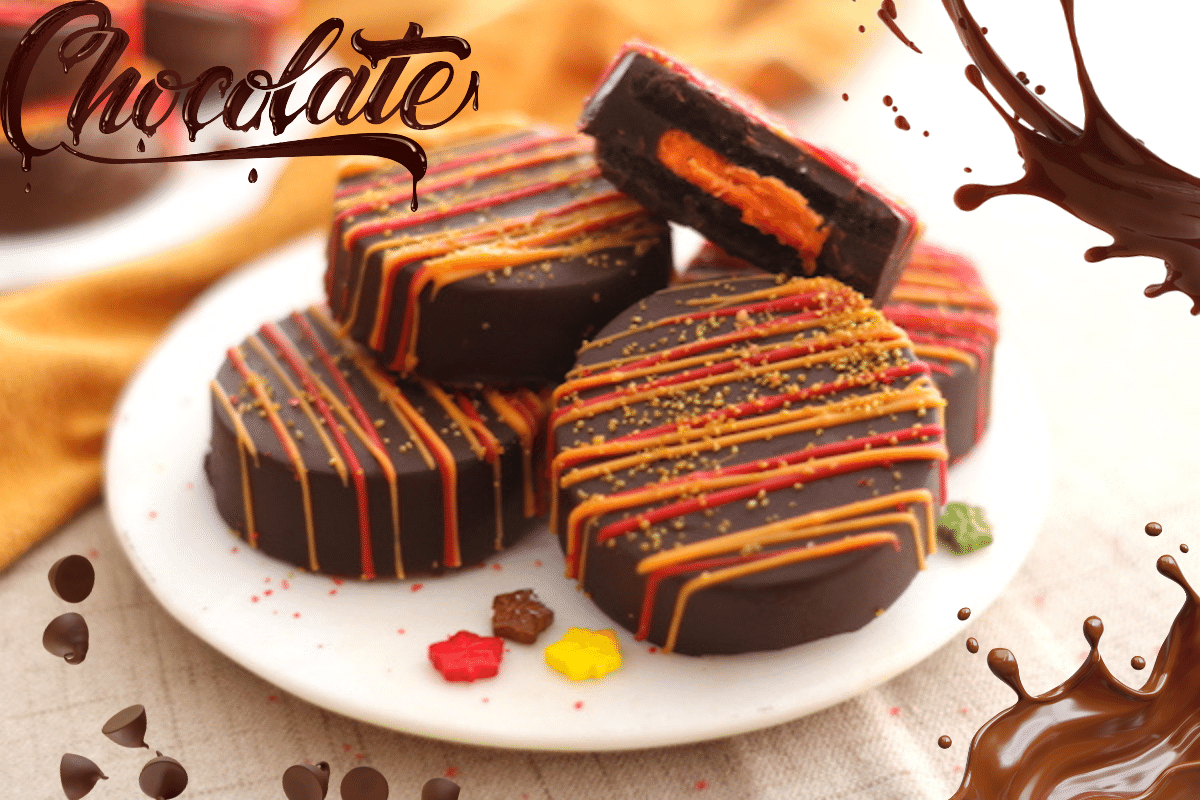
5. Drizzled Designs:
Drizzle contrasting melted chocolate over Oreos using a spoon or piping bag to create artistic patterns.
6. Nuts and Seeds:
Add chopped nuts like almonds or healthy options such as sesame or chia seeds for a nutty twist.
7. Dried Fruit:
Press dried fruit pieces like cranberries or apricots onto the chocolate for a fruity touch.
8. Caramel or Toffee Bits:
Drizzle caramel sauce or sprinkle toffee bits over Oreos for a rich, buttery taste.
9. Chocolate Chips or Shavings:
Press chocolate chips or create shavings on top before the coating sets.
10. Colorful Candy Melts:
Use colored candy melts or colored white chocolate for vibrant, eye-catching Oreos.
11. Theme-Based Decorations:
Tailor toppings to match specific themes or events, such as red and green for Christmas or pastels for Easter.
12. Personalized Messages:
Add a special touch to your chocolate-covered Oreos by writing short messages or names directly on the chocolate coating. Utilize edible food pens for a personalized and delightful treat.
FAQs
How do you add decorations to chocolate-covered Oreos?
Decorating chocolate-covered Oreos offers a variety of options. Drizzle different colored melted chocolate or royal icing, top them with sprinkles or chopped nuts, or get creative with stencils. Each method adds a unique touch to your delicious treats!
How to make chocolate-covered Oreos with marble?
To make marble-patterned chocolate-covered Oreos, start by setting the Oreos in the fridge for 15 minutes. In the meantime, prepare a marble effect in white chocolate by adding a few drops of oil-based food coloring. Use a toothpick or cake tester to gently swirl the food coloring into the white chocolate. Once the Oreos are slightly chilled, dip the top of each chocolate-covered cookie into the marbled white chocolate, creating a visually stunning and delicious treat.
How do you use Oreo cookie chocolate molds?
To use Oreo cookie chocolate molds, start by filling each mold cavity 1/3 full with melted chocolate. Next, embed your sandwich cookies in the mold, ensuring they are centered. Top off each cavity with more melted chocolate to fully cover the Oreos. Chill the molds in the fridge or freezer for a few minutes until the chocolate sets. Once chilled, your professional-quality chocolate-covered Oreos are ready to be unmolded and enjoyed.
Why do Oreos make me thirsty?
The high sugar content in Oreos can contribute to dehydration. When sugar enters your bloodstream, water is drawn from your cells to restore balance. As your cells signal the need for more water to the brain, you may feel thirsty and inclined to sip on a beverage.
How do you dip Oreos in chocolate without mold?
To dip Oreos in chocolate without a mold:
- Melt a bag of semi-sweet chocolate chips until smooth, using the microwave or a double boiler.
- Dip each Oreo into the melted chocolate, ensuring full coverage.
- Tap off any excess chocolate.
- Place the chocolate-covered Oreos on a lined baking sheet to set.
This method allows you to enjoy chocolate-covered Oreos without the need for a mold
Read more about : Crafting Delight: How to Make a Breakable Chocolate Heart